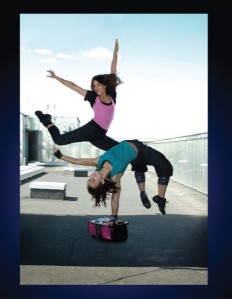
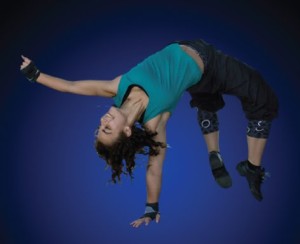
Untuk tutorial ini Anda perlu foto yang lumayan bagus agar keliatan ferfect juga ... dan sebaiknya gelap (efek ini bekerja jauh lebih baik dalam pengaturan gelap)
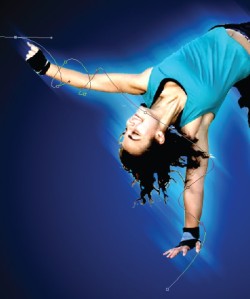
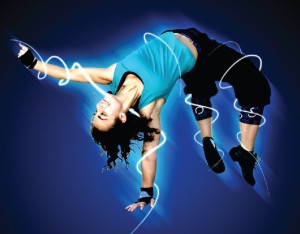
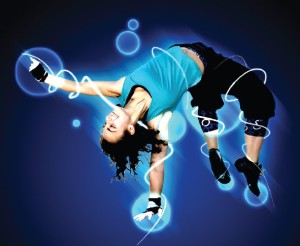
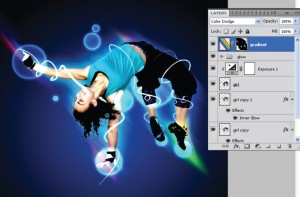
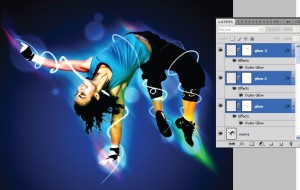
Hasil Editing

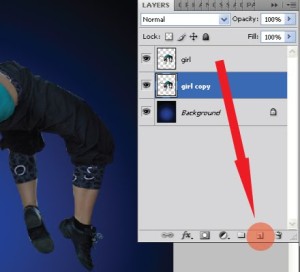
Buka foto yang mau anda edit, kemudian pergi ke tab jalur dan klik membuat jalan baru.
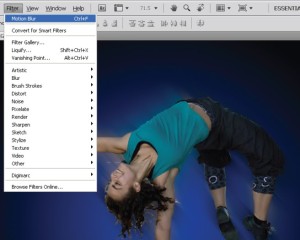
Tekan "P" pada keyboard untuk memilih alat pena, Dapatkan ide dasar dari mana api akan. Perlu dimensi pikiran dan tindakan. Swirls melakukan keajaiban!

A. Click to start your path
B. Click your next point, hold and drag to create a bezier spline path, which is necessary to create flowing lines
C. Continue doing this, following the idea of where you want the fire to go.
Dont worry about getting it right the first time as you can change the
spline at any time…another little tip – if you press and hold ctrl while
using the pen tool you can temporarily access the direct selection tool
which will allow you to edit the spline (a big time saver)

04
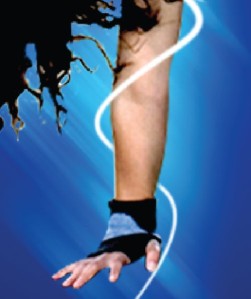
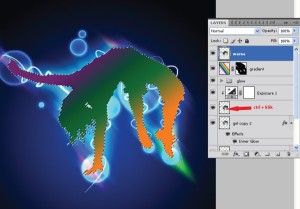
And eventually…you get something like what i have below. Remember that your only going to use the parts of your path that are in front of the object your path follows…in this case the models arm, and leg. So don’t waste time trying to make the hidden parts look pretty.
05
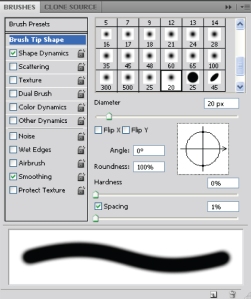
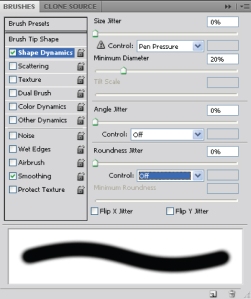
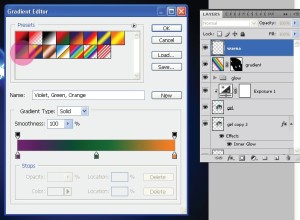
A. Now you want to select a soft round brush (i used a 5 pixel brush here) and pick an orange color.B. Make a new layer and name it Fire.
C. Go back to the paths tab and select stroke path with brush.

06
You should immediately see the stroked path.On mine you’ll see splatters and flairs that weren’t part of the original path. Those give the fire line the illusion that it is moving, and were accomplished by simply grabbing the clone stamp tool – using a spatter brush and cloning/stamping areas of the path at random.
07
Mask/erase the parts of the path that are behind the legs/arms or whatever it is your paths follows.08
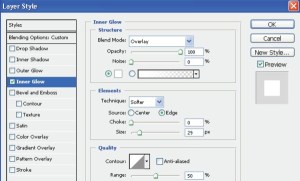
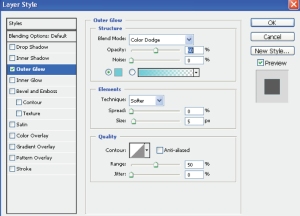
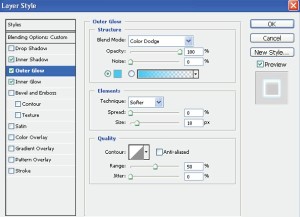
Right click on the Fire layer and select blending options, and use these options/values.Feel free to play with the settings (that’s how i discovered this technique)
You might end up with something better!

09
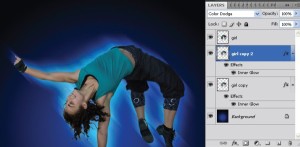
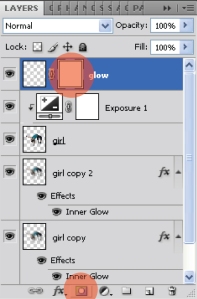
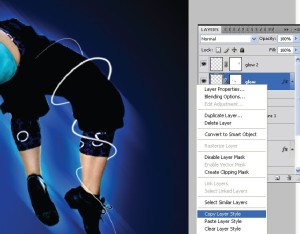
Duplicate the Fire layer, and set the layer mode to OVERLAYClick the eye next to inner shadow and inner glow on the duplicate layer to deactivate them.

10
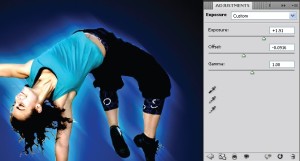
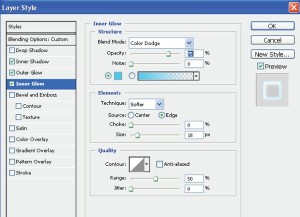
Now double click on outer glow on the duplicate and change the values to this.
Conclusion
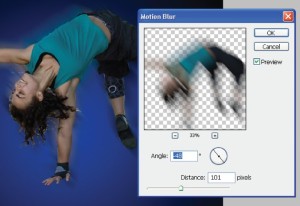
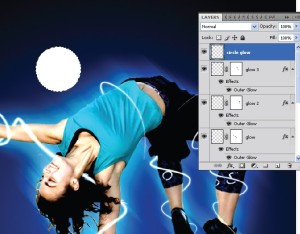
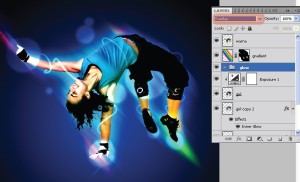
Spend a little time, and you can make something like what i have below…For a different effect, duplicate the FIRE layer again, and filter>distort>wave.
Play with the opacity levels, and play with the blending modes – particularly OVERLAY.
Good luck!
MAAF..BAHASA NYA BAHASA INGGRIS,DIKARENAKAN HARI SUDAH LARUTT MALAMMJADI MALAS SUDAH NGANTUK..
Terima kasih atas kungjungan nya...
CDSee Pro 5 adalah aplikasi profesional dan dapat diandalkan, Software ini dirancang untuk merampingkan alur kerja dan untuk meningkatkan produktivitas Anda. Memberdayakan Anda untuk melihat, memproses, mengedit, mengatur, katalog, menerbitkan, dan meng-arsipkan koleksi foto Anda dengan presisi dan kontrol yang diminta oleh fotografer profesional di seluruh dunia.
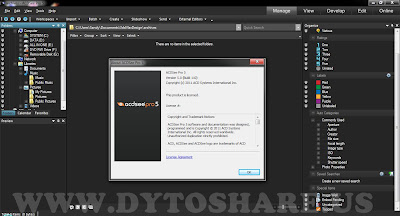
What's New in ACDSee Pro 5
Feel the difference in your photography
ACDSee Pro 5 delivers more features photographers want, giving you even more control over your photography workflow.Photo Developing

Smarter Sharpening
A new user-controlled edge detection mask slider lets you focus the sharpening effect more to edges and textures than non-textured areas.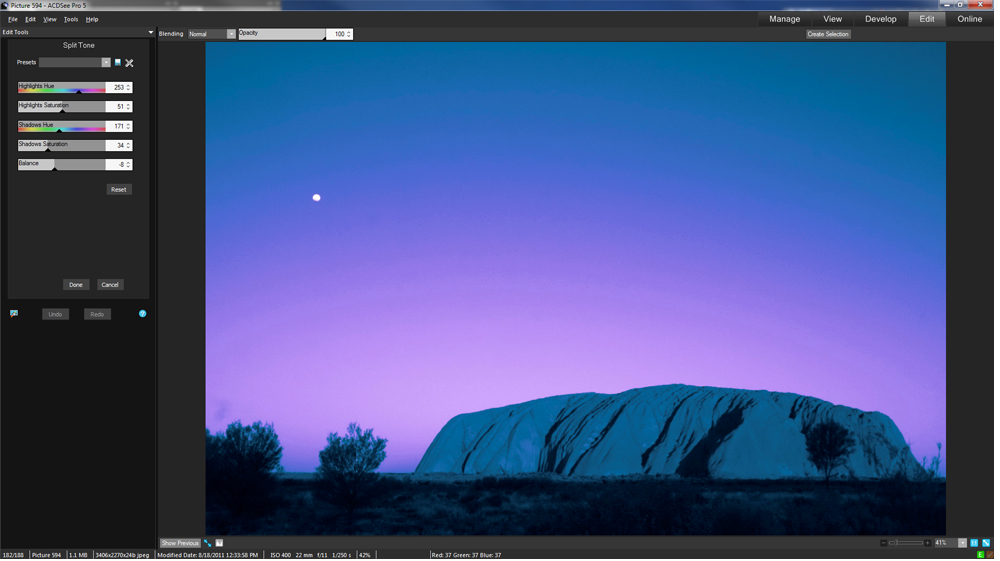
Split-toning
Take your photos to the edge in either Develop or Edit mode using split-toning to create sepia or tinted black & white, Or add a tinted color to highlights and another to shadows to create a dramatic toning effect.Photo Editing

Dodge and Burn
Target shadows, midtones or highlights for lightening or darkening with the Dodge and Burn tool, or selectively add vibrance, saturate or desaturate areas of interest.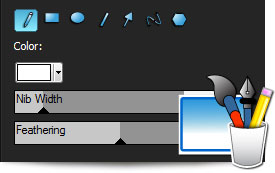
Drawing Tools
Put your photos to work for you using drawing tools to add lines and shapes such as squares, circles and arrows to draw attention to certain elements in your image. You can also adjust the width, feathering and blending of your brush to create subtle or dramatic drawing effects.Special Effects
Apply and fine-tune a range of pre-set effects quickly and easily with the Special Effects palette, now including: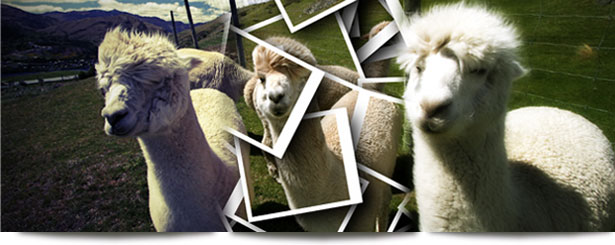
Lomo Effect
Apply the popular Lomo effect to give an edgy, retro feel to your photos.Collage Effect
Creatively display your photo in a collage of prints.Orton Effect
Give an ethereal, pastel-like touch to your portraits and landscapes.Workflow
Color Labels
Use color labels to quickly identify groups within a large number of photos for processing. As your review your photos, quickly mark ones for different stages of your workflow. For example, assign files to color labels you have named such as upload, print, reject, develop or edit and then click a color label in the Organize pane to quickly display all of the files assigned to that label. Or use them in combination with the Group by, or Filter By features to refine your list. Color labels, like tagging, categories and ratings, are a way to set aside, organize, and group your photos without moving them into different folders.
Batch Export Tool
Save a group of photos to your specifications faster than ever with the updated ACDSee Pro 5 Batch Export tool. The batch export tool allows you to create presets for easily exporting groups of files to specified folders, file names, formats, colour spaces and dimensions.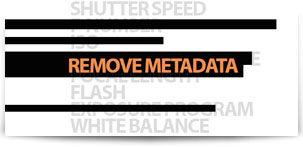
Remove Metadata
Use the Remove Metadata tool to keep your proprietary information private by stripping EXIF and IPTC metadata to protect the details of your locations, camera settings and equipment choices.Link Download
Sharebeast | ACDSee pro 5.0 - Full Version (68.79MB)
Sharebeast | Crack_ACDSee Pro 5.0 (6.0 MB)
Terima kasih atas kungjungan nya...

WebcamMax 7.6.6.2 Full Version - Merupakan software webcam yang berfungsi untuk memberikan efek animasi dalam pengambilan foto maupun video yang kita lakukan melalui kamera webcam laptop. Selain berfungsi memberikan efek efek animasi, WebcamMax 7.6.6.2 full versi juga dapat anda gunakan untuk keperluan video chat di ICQ, AIM, MSN, Camfrog, Skype, Paltalk, Yahoo, ANYwebcam, Stickam dll.
Screenshot

- For all webcam programs, ICQ, AIM, MSN, CamFrog, Skype, Paltalk, Yahoo Messenger etc.
- More than 1,000 effects at www.webcammax.com, including Mosaic, TV wall, Movie scene, Water, Smog, Emboss, Emotions and etc
- Floating text over video.
- Switching dynamically between multiple live and stored sources (videos, movies, pictures, or real time desktop).
- Effects DIY.
- Sharing single webcam by multiple programs at the same time.
- Becoming fashionable, sexy, cute, romantic or bewitched, or even horrible.
- Taking photos with whatever background you like and whenever you want.
Link download
Install
1. Instal webcamMax ( jangan di jalankan )
2. Copy patch ke Direktori webcamax
3. Run patch lakukan patching
4. Run program WebcamMax
5. Klik get more ( pilih enter SN )
6. Run keygen masukin kode 00000000 ( klik generate )
7. Copy SN ( Pastekan ke webcamMax lalu OK, Terus pilih manual )
8. Nah muncul SN baru ( di copy terus pastekan ke keygen pada kolom code )
9. Klik generate lagi ( copy uNLOCK pastekan ke webcamMaxnya )
10. klik OK/YES
11. Selesai ^^
Terima kasih atas kungjungan nya...

Boilsoft Video Joiner 6.57.14 Full Version - Boilsoft Video Joiner berfungsi untuk menggabungkan file video yang di pecah / split menjadi satu file video. Software ini dapat menggabungkan hampir semua format video populer seperti AVI, DivX, MPEG-4, VOB, RM, RMVB, ASF, WMV, WMA, 3GP, MP4, MKV, FLV dan MTS.
Screenshot

Features
- Direct Stream Clone Mode joins same type files in super speed.
- Re-encode Mode joins any different format files as you like.
- Support join AVI, DivX, MPEG-4 files.
- Support join MPEG-1 and MPEG-2 video files.
- Support join VOB video files.
- Support join RM, RMVB files.
- Support join ASF, WMV, WMA files
- Support join 3GP(.3gp, .3g2) files
- Support join MP4(.mp4, .m4a, .m4v) files
- Support join MKV files.
- Support join FLV, MTS files in Re-encode Mode.
- Support join MPEG Audio and Windows Media Audio.
- Join video files as many as you want.
- Scramble and rearrange the video clips in the sequence that you exactly desire.
- Very User-friendly interface.
Link download
Terima kasih atas kungjungan nya...

Ashampoo Photo Converter 2 v2.0.0 Full Version - Adalah software image editing yang dapat anda manfaatkan untuk mengedit puluhan bahkan ratusan koleksi foto-foto anda secara bersamaan dengan cepat dan mudah. Ashampoo Photo Converter 2 v2.0.0 Full Versi memungkinkan anda untuk mengedit, melakukan penyesuaian ukuran foto, memutar (rotasi), memperbaiki foto secara otomatis, dan melindungi foto / gambar dengan menambahkan watermark pada foto / gambar secara bersamaan hanya dalam sekali pengerjaan.
Screenshot

What's New ?
Ashampoo Photo Converter 2 our most comprehensive image converter ever! Our developers were able to greatly enhance the feature set while keeping the user interface well-structured.
User Interface
No more trial and error. Ashampoo Photo Converter 2 features a live preview, enabling you to freely experiment with the multitude of available features.
Optimization
Spare yourself the hassle of finetuning colors and contrasts and let Ashampoo Photo Converter 2 auto-determine the best settings for each of your images. And with "Clean Skin", compression artefacts are a thing of the past.
Enhanced Color Manipulation
Ashampoo Photo Converter 2 gives you access to more sophisticated color parameters such as color temperature, hue and saturation.
Artistic Effects
Let your imagination run wild with a myriad of artistic effects including Prencil Drawing, Sepia and Oil Painting. The built-in preview provides immediate feedback so feel free to explore.
Auto-Insert EXIF Date
Modern digital cameras store additional information such as the time an image was taken with each image file. Ashampoo Photo Converter 2 can auto-insert the creation dates into your images to help you keep track of your photos.
Link download
Install
1. Ekstrak
2. Install Ashampoo Photo Converter
3. Copas file "Registration.reg" ke registry windows / double klik file reg
4. Enjoy
Terima kasih atas kungjungan nya...
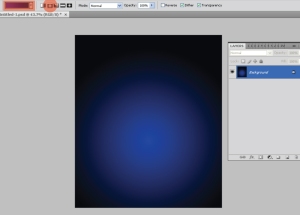
Pada
tutorial photoshop kali ini, kita akan belajar bagaimana caranya
membuat efek glow di sekitar objek gambar. Efek glow adalah efek
pendaran cahaya seperti yang biasa kita lihat pada lampu neon. Tutorial
photoshop kali ini akan menjelaskan langkah demi langkah bagaimana
menciptakan efek glow, memadukannya dengan gambar, dan pewarnaan
harmonis agar gambar terlihat menyatu dengan efek-efek sekitarnya....
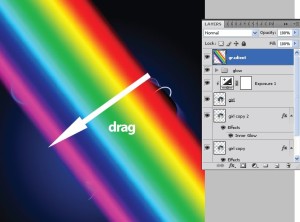
Hasil Akhir Tutorial

Langkah-langkah tutorial :
langkah 1


Terima kasih atas kungjungan nya...
About This Blog